Have you ever tried hatching killifish eggs but didn’t want to deal with the mess of peat? It can feel overwhelming when you’re new to it or trying to simplify your setup without harming the eggs.
The easiest way to hatch killi eggs without peat is by using the water incubation method. This involves placing the eggs in clean water with low light, steady temperature, and gentle aeration, allowing them to hatch safely and naturally.
While the traditional peat method has its place, learning this clean approach can make your breeding process smoother and more manageable.
Why Some People Avoid Using Peat
Peat can be messy, hard to clean, and sometimes hard to find. It also clouds the water and stains tanks, making visibility difficult. Some breeders avoid it because it changes water parameters quickly, which can stress out the eggs or fry. Others simply prefer cleaner methods that don’t involve organic material breaking down in their tanks. Another reason people move away from peat is the smell—it can be quite strong. And for those with allergies or sensitive skin, handling it may cause discomfort. Peat is effective, but it isn’t always convenient, especially if you want a low-maintenance setup.
Some killifish eggs also do well in water incubation, so peat isn’t always necessary. Choosing not to use peat doesn’t mean lower hatch rates if done right.
You might still need to adjust a few things when switching methods, but once set up, a peat-free process can be just as reliable and even easier to manage over time.
How to Hatch Killifish Eggs Without Peat
Start with a clean, shallow container filled with aged or conditioned water. The temperature should stay stable, usually around 72–75°F. Add a few drops of methylene blue or almond leaf extract to prevent fungus.
Place the eggs into the water gently using tweezers or a soft brush. Keep the container out of direct light but in a well-ventilated area. Some people add gentle aeration using an air stone or sponge filter to circulate the water slightly. Check the eggs daily. Remove any that turn white, as they are no longer viable and can spread fungus. Most eggs will hatch within 10–21 days depending on the species and conditions. Once the fry hatch, transfer them carefully to a grow-out tank with clean water and gentle filtration. Feed them with infusoria or vinegar eels until they’re big enough for baby brine shrimp. Keeping things simple and clean will improve your chances of a healthy hatch.
What to Watch for During Incubation
Fungus is one of the biggest risks during incubation. Even with treatments like methylene blue or almond leaf extract, some eggs may still be affected. Remove any white or fuzzy-looking eggs immediately to protect the rest.
Temperature swings can slow development or even stop it altogether. Keep the container in a quiet place with a stable environment. Avoid windows, heating vents, or areas with strong lights. If the room temperature isn’t consistent, consider using a small heater. Also, don’t overcrowd the eggs. Too many in one container can lower oxygen levels and increase waste, even with aeration. Watch for signs of hatching like eye development and tail movement inside the eggs. Once you see wriggling, fry will usually emerge soon. It’s a slow process, but staying consistent with care makes a big difference.
Check on the eggs once or twice a day. You don’t need to touch them—just observe. If something looks off, like cloudiness in the water or a sudden foul smell, do a small water change. Replace with water that’s the same temperature and has been conditioned. Consistent, small actions will keep things stable and increase your chances of success with a peat-free setup.
How to Care for Fry After Hatching
Once the fry hatch, they need immediate access to food. They’re tiny, so offer infusoria or vinegar eels as a first food. Avoid strong currents in the water and don’t add them to a tank with larger fish.
Keep the water shallow for the first few days. This helps them stay near the food and reduces stress. Use a sponge filter or airline tubing with a slow bubble rate for aeration. Change a small portion of the water every couple of days using water that’s the same temperature and has been dechlorinated. After about a week, start feeding freshly hatched baby brine shrimp. Their growth will speed up once they get proper nutrition. Be careful not to overfeed—uneaten food can foul the water quickly. Keep everything clean and gentle.
Clean water, small food, and a stress-free space are the most important things for young killifish. If you notice weak swimmers or slow growers, separate them so they can eat without competition. Use a flashlight to check on them during feeding and to spot any dead fry early on. Remove them right away to keep the rest safe. As they grow, slowly increase water depth and improve filtration. Keep track of their growth and don’t rush to move them to a bigger tank until they’re strong enough.
Common Mistakes to Avoid
Skipping water treatment can lead to fungus or harmful bacteria. Always use dechlorinated or aged water before adding eggs. Even clean tap water can harm delicate embryos if it contains chlorine or fluctuates in pH or temperature.
Overfeeding fry is another common mistake. Uneaten food quickly breaks down and pollutes the water, harming the fry. Feed small amounts and watch to see if they finish it within a few minutes before offering more.
When to Move Fry to a Grow-Out Tank
Once fry are swimming well and eating baby brine shrimp daily, they’re ready for a grow-out tank. This usually happens after two to three weeks. Use a tank with clean, aged water and gentle filtration. Increase space gradually so they can grow without sudden stress. Avoid fast-moving water or aggressive tank mates. Keep the setup simple—bare bottom or fine sand helps with cleaning. Feed small meals often and continue regular water changes to support healthy growth. Always observe their behavior and adjust conditions as needed. Growth rates vary, so be patient with slower fry during this stage.
Final Thoughts
A peat-free setup can be clean, effective, and easier to manage over time. It just takes a little consistency.
FAQ
Can killifish eggs hatch in plain water without any additives?
Yes, but it’s risky. Plain water can work, but using additives like methylene blue or Indian almond leaf extract helps prevent fungus. These additives are especially helpful if you’re not using peat, as they support cleaner and safer incubation. Without them, you’ll need to watch very closely for fungus and be ready to remove any affected eggs fast. If you try plain water, use aged and dechlorinated water, and make sure the temperature stays stable. Still, it’s safer to use something mild to reduce fungal growth, especially in the first several days.
How do I know if an egg is dead or still developing?
Live eggs often turn clear and show tiny eyes or movement inside as they develop. They usually stay firm and slightly shiny. Dead eggs turn white, gray, or fuzzy. Some may also collapse or float oddly. If you’re unsure, watch for changes over 1–2 days. A healthy egg will stay the same or show progress, while a bad one will worsen or spread fungus. Remove suspicious eggs quickly to keep the others safe. Using a flashlight from behind or underneath the container can help you see what’s going on inside the eggs more clearly.
How many eggs should I keep in one container?
It’s best to space them out. Around 20–30 eggs in a small shallow container (about 1 liter of water) is a safe number. Crowding eggs can lead to lower oxygen levels and faster buildup of waste, which increases the risk of fungus. If you have a large batch, split them across multiple containers. This makes it easier to check on them, and if something goes wrong in one container, the others are still safe. Also, eggs hatch at different times, so separating batches can help you track progress more clearly and make cleanup easier.
How often should I change the water during incubation?
Change a small amount every few days if needed—around 10–15%. If the water starts to smell, looks cloudy, or has too many particles, do a gentle water change using clean, aged water. Avoid big changes, which can shock the eggs. If you’re using almond leaves or methylene blue, they help keep the water more stable, so frequent changes may not be needed. But if you skip additives, you’ll likely need to change the water more often. Use a turkey baster or syringe to avoid disturbing the eggs.
Why aren’t my killifish eggs hatching?
The most common reason is that they’re not ready yet. Some killifish eggs take several weeks to hatch. Make sure the temperature is consistent and check for signs of development. Another reason could be infertile eggs. These usually turn white early on. Fungus, low oxygen, or bad water can also prevent hatching. If you’ve done everything right and still nothing happens after three weeks, try triggering hatching with a small temperature drop or a tiny bit of fresh water. Some species respond to small environmental changes like these.
Do I need to aerate the water?
Gentle aeration is helpful but not required if you do small water changes often and don’t overcrowd the eggs. A tiny air stone or sponge filter with a slow bubble rate can keep oxygen levels steady. Just make sure the current doesn’t push the eggs around. If you notice a stale smell or cloudy water, you might need more circulation. On the other hand, if the eggs are in a very clean, shallow container in a quiet room, you can get away without it as long as the water stays fresh.
Can I mix eggs from different killifish species in the same container?
It’s better not to. Different species often have different incubation times, water needs, or temperature preferences. Mixing them can cause issues when one batch hatches before the other. You might also confuse which fry belong to which species. If you must keep them together, label the container carefully and be prepared to separate fry quickly as they hatch. However, keeping one species per container is the simplest and safest method, especially when you’re just starting out.
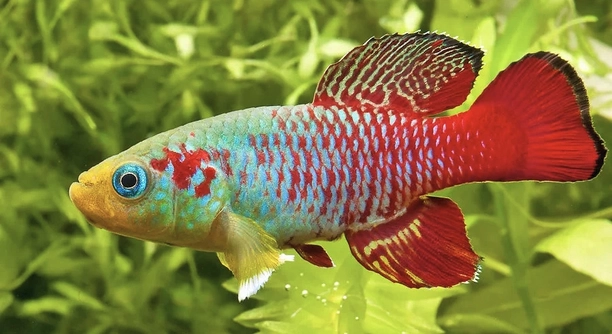
Do all killifish species hatch without peat?
Not all, but many do. Some species, especially those from seasonal environments, are more dependent on peat-like conditions. Others, like Aphyosemion or Fundulopanchax types, often hatch well in water incubation. If you’re unsure, look up care notes for your specific species. Still, even peat-loving species can sometimes hatch in clean water if the conditions are right. You might just need to wait longer or try a few batches before finding what works best for your fish.
Final Thoughts
Hatching killifish eggs without peat is a clean and simple method that works well for many people. It avoids the mess, smell, and color changes that come with using peat. With just a shallow container, clean water, and a few added precautions, you can still get strong hatch rates. The key is to keep things stable. Use aged or dechlorinated water, add mild antifungal support like methylene blue or almond leaf extract, and keep the eggs in a quiet spot with steady temperature. Watch the eggs daily, and remove any that look white or fuzzy. Even without peat, many types of killifish eggs will hatch just fine with a little patience and care.
This method can be a good option if you want more control or need to keep your space cleaner. You can easily check the eggs, spot fungus early, and track development more clearly in water. Also, once the fry hatch, they are already in water, so there’s no need to transfer them from peat. This reduces the chance of damage or stress. For new breeders or those with limited space, this method is much more manageable. While it may not work for every species, especially those that need dry incubation phases, it’s still effective for many commonly kept types.
Consistency is what makes this method successful. That means keeping the water clean, feeding fry correctly, and not rushing the process. Watch the fry closely as they grow, and adjust their care based on their behavior and development. Not every batch will be perfect, but the more you practice, the better you’ll get at spotting issues early and handling them. Hatching without peat isn’t just about avoiding mess—it’s also about creating a controlled and calm environment. For those willing to put in the time, it can be just as rewarding as traditional methods.

Hello,
If you enjoy the content that we create, please consider saying a "Thank You!" by leaving a tip.
Every little bit helps us continue crafting quality advice that supports the health, happiness, and well-being of pets around the world, for pets of all shapes, sizes, and species.
We really appreciate the kindness and support that you show us!