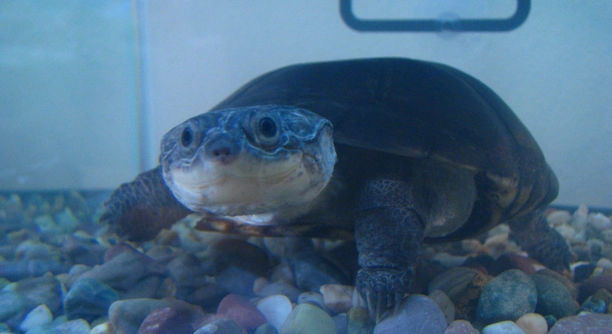
Creating the perfect environment for your turtles is essential for their well-being. A DIY turtle tank divider is a simple solution to keep different species separated or create zones within your tank. It is an easy project to tackle.
To make DIY turtle tank dividers, measure your tank’s dimensions and decide the divider placement. Use materials like acrylic, mesh, or PVC to cut and fit the pieces. Secure them with silicone or suction cups for stability and safety.
With a few simple materials and a little creativity, you can create a functional and safe divider that suits your turtle’s needs. The process can be easy to follow and provides a better living environment for your pets.
Choosing the Right Materials for Your Divider
When building a DIY turtle tank divider, the material you choose plays a significant role in the divider’s function and longevity. Acrylic is a popular option due to its durability and clarity, allowing you to keep an eye on your turtles without obstructions. PVC is another great choice as it is easy to work with and can be cut to size quickly. Mesh is ideal if you want something breathable and lightweight, though it might not be as sturdy as acrylic or PVC.
The material should be strong enough to hold up over time and provide a safe environment for your turtles. Always ensure the material is safe for aquatic use, free of harmful chemicals. It’s also essential that the material can be easily cleaned since turtles can be messy, and you’ll need to maintain the divider regularly.
Some people prefer transparent materials like acrylic, as they allow for better visibility of the entire tank. Others might choose opaque materials to help create distinct zones within the tank. No matter what material you decide on, make sure it fits your tank’s design and your turtles’ needs.
Cutting and Fitting the Divider
Once you’ve selected your materials, the next step is cutting and fitting the divider to your tank’s dimensions. Measure the length, width, and height of your tank carefully to ensure a precise fit. Accurate measurements are crucial for a secure and stable divider that won’t shift around over time.
Cutting the materials to size is straightforward if you have the right tools. For acrylic or PVC, a utility knife or saw will work. Ensure that your cuts are straight and even for the best result.
After cutting, you can proceed to secure the divider in place. Using silicone or suction cups ensures the divider remains stable. It’s important to let the silicone cure properly before adding water or turtles to the tank.
Securing the Divider in Place
Securing the divider is one of the most important steps in building your DIY tank divider. Silicone is commonly used because it creates a strong bond and is safe for aquatic environments. It also seals any gaps that might allow water to pass through, ensuring that your turtles stay in their designated areas.
Suction cups are another great option, especially if you want a removable divider. They’re simple to install and easy to move around if needed. However, make sure the suction cups are strong enough to hold the weight of the material and withstand your turtles’ movements.
In either case, be sure the divider is sturdy enough to withstand your turtles’ activity. Some turtles are more active than others, and the divider should be able to resist any accidental bumps or pushes. Allow time for the silicone to dry and test the stability before adding any water to the tank.
Final Considerations
When setting up your turtle tank with dividers, it’s essential to think about the long-term care of your turtles. Make sure the divider allows for adequate swimming space and doesn’t overcrowd any sections. Consider their specific needs, such as basking spots, food areas, or hiding spaces.
Maintenance is also key. Be ready to clean the divider frequently to avoid algae build-up or debris that could impact the water quality. It’s best to choose materials that are easy to clean and won’t degrade over time from exposure to water.
A well-made divider can provide your turtles with a comfortable, organized tank environment. By selecting the right materials and ensuring the divider is securely installed, your turtles will thrive in their designated spaces.
Measuring Your Tank for a Perfect Fit
Accurate measurements are crucial when building your DIY divider. Measure the length and height of the tank, as well as the interior width. Double-check your measurements before cutting to ensure a tight fit. This will help the divider stay securely in place and prevent any gaps that might disrupt the tank’s layout.
It’s important to consider the tank’s shape as well. For rectangular tanks, measuring the length and height is straightforward. However, if your tank has unusual curves or angles, measuring can become trickier. In such cases, using a flexible measuring tape can be beneficial. Taking multiple measurements from different angles will ensure a better fit.
Make sure to account for the thickness of your material when cutting the divider. This ensures it will fit neatly within your tank’s dimensions. A well-fitted divider provides stability and enhances the overall setup.
Choosing Between Fixed or Removable Dividers
Deciding between a fixed or removable divider depends on your needs. Fixed dividers are permanent and often provide a more secure barrier. They are ideal for tanks that won’t need frequent changes. Removable dividers, on the other hand, offer flexibility and can be adjusted if necessary.
For fixed dividers, silicone works well to hold the material securely. This type of setup works well for creating permanent zones within the tank. If you plan to add or remove sections later, a removable divider might be better suited. Suction cups are a simple method for securing a removable divider.
It’s important to think about your turtle’s needs and how often you might need to change the tank’s layout. If you want to frequently adjust the tank, go for a removable divider. Otherwise, a fixed divider will provide long-lasting stability.
Maintaining Tank Dividers Over Time
Maintaining your turtle tank divider is essential to ensure it remains clean and functional. Over time, algae, debris, and water buildup can accumulate on the surface of the divider. Regular cleaning will keep the divider looking neat and prevent any potential problems with water quality.
Using safe cleaning materials is important to avoid harming your turtles. Mild soap or vinegar solutions can help clean acrylic, PVC, or mesh without damaging the materials. Avoid harsh chemicals, as they can leave harmful residues. A soft cloth or sponge should be used to scrub the divider gently.
Checking the divider regularly for wear and tear is also crucial. Over time, silicone can break down, or suction cups may lose their grip. Keeping an eye on the divider’s stability ensures your turtles remain safely separated.
Customizing Your Divider for Specific Tank Needs
If your tank houses different turtle species, it’s important to customize the divider to suit each species’ specific needs. For example, some turtles require more basking space, while others may prefer larger swimming areas. Design your divider with these preferences in mind.
Consider creating different sections within the tank. Some turtles may need more open water, while others might benefit from a smaller, more sheltered space. With careful planning, you can build a divider that meets the needs of each species, ensuring their health and comfort. Customizing also allows for easier monitoring of the tank’s overall environment.
Adding Additional Features to Your Divider
Beyond just separating your turtles, you can enhance your divider with additional features. Adding small shelves, plants, or basking platforms on the divider creates more layers for your turtles to explore. This helps in making the tank more interesting and natural for them.
These features can be added by attaching small platforms or securing live plants within the divider. Not only will it improve the aesthetic appeal, but it will also provide turtles with opportunities to bask or hide. Be sure the additional features don’t compromise the divider’s stability.
Budget-Friendly Alternatives for Dividers
Creating a DIY divider doesn’t have to be expensive. You can find budget-friendly materials that still get the job done. For example, mesh netting or plastic containers can be used as dividers, providing affordable alternatives to more expensive options like acrylic.
These materials are lightweight, easy to cut, and can be adjusted to fit your tank. Even basic aquarium supplies, like aquarium-safe glue and suction cups, can help create a secure divider. With a little creativity, you can build an effective and low-cost solution that fits your tank’s needs.
FAQ
How do I prevent the divider from slipping or moving around?
To keep your divider from moving, ensure it’s securely installed. Silicone can be used to attach the divider to the tank, providing a strong and stable bond. Suction cups are another option if you prefer a removable divider. Be sure to check that the suction cups are firmly attached and don’t lose their grip over time. If you notice any movement, reinforce the divider with additional suction cups or silicone. You can also make adjustments by adding more securing points if necessary.
Can I use a glass divider for my turtle tank?
Yes, you can use a glass divider, but it requires careful handling and installation. Glass is heavier and more fragile than materials like acrylic or PVC, so it’s important to ensure that it is properly secured. Glass dividers are clear and offer excellent visibility, but they can also be more prone to breaking if not handled carefully. If you choose glass, ensure the edges are smooth to avoid any sharp areas that could harm your turtles. You can use silicone to secure the glass divider in place.
What should I do if my divider becomes covered with algae?
If your divider gets covered with algae, it’s important to clean it regularly to maintain a healthy tank environment. You can use a soft brush or sponge to scrub off the algae. For acrylic or glass dividers, a vinegar solution can help dissolve algae without damaging the material. Avoid using harsh chemicals that could harm your turtles. Regular cleaning will also prevent algae build-up and help keep the water quality in your tank at its best.
How do I adjust the divider if it doesn’t fit correctly?
If the divider doesn’t fit properly, you can make adjustments by trimming or resizing the material. For acrylic or PVC, a saw or utility knife can help you cut the divider to the correct dimensions. Measure your tank again and make sure your divider fits snugly in place. If you’re using mesh or plastic containers, you can also trim them to fit. Always check the divider’s fit after making adjustments to ensure it provides stability and doesn’t cause any issues in the tank.
Should I use a divider if I have multiple turtles in the tank?
Using a divider is a good idea if you have multiple turtles, especially if they need to be separated for various reasons such as size differences, territorial behavior, or varying care needs. A divider helps to create safe spaces for each turtle, preventing them from fighting or stressing each other out. However, be sure that each section is large enough to allow for proper swimming, basking, and hiding spaces. You should also monitor their behavior to ensure that the divider is working as intended.
Can I create a divider with mesh or netting?
Yes, mesh or netting can be used to create a divider. This option is lightweight and breathable, making it a suitable choice for separating turtles without restricting water flow. However, mesh dividers might not provide the same level of sturdiness as materials like acrylic or PVC. It’s important to make sure the mesh is strong enough to withstand your turtles’ movements. You can attach the mesh securely to the tank using silicone, suction cups, or clips. Keep in mind that mesh dividers might not be as durable in the long run compared to solid materials.
How do I prevent water from flowing through the divider?
To prevent water from flowing through the divider, you need to ensure that it’s tightly sealed and covers the entire height of the tank. If using acrylic or PVC, make sure the edges are sealed with silicone to prevent water from escaping. If you use mesh, ensure it’s fine enough to block water flow and avoid gaps between the mesh and the tank walls. A well-fitted divider will create separate environments for your turtles while maintaining water stability in each section.
How long will my DIY turtle tank divider last?
The lifespan of your DIY turtle tank divider depends on the materials you use and how well you maintain it. Acrylic and PVC dividers can last for several years if cared for properly, while mesh or plastic dividers may wear out more quickly. Regular cleaning and inspections for any signs of damage or wear can help extend the life of the divider. If you notice any cracks or instability, it’s best to replace or repair the divider to ensure your turtles’ safety.
What kind of materials should I avoid when making a turtle tank divider?
Avoid using materials that may be harmful to your turtles, such as treated wood or anything that contains chemicals or coatings that could leach into the water. Certain plastics may break down over time and release harmful substances into the tank. It’s important to choose materials that are safe for aquatic environments and can withstand constant exposure to water. Always ensure that the materials are non-toxic and aquarium-safe to protect your turtles and maintain a healthy habitat.
Can I use a divider to separate different species of turtles?
Yes, you can use a divider to separate different species of turtles, especially if they have different environmental needs. For example, some turtles prefer more aquatic spaces while others need more basking areas. A divider can create distinct sections in the tank, allowing each species to have its preferred environment. Make sure that the divider doesn’t create stress or harm due to size differences, and monitor the turtles’ behavior to ensure they are comfortable in their designated sections.
Final Thoughts
Creating a DIY turtle tank divider can be a rewarding project that helps provide a safer and more comfortable environment for your turtles. With a little planning and the right materials, you can build a divider that suits the needs of your turtles and enhances the overall look of your tank. Whether you’re separating different species or simply organizing the space, a well-built divider can make a big difference in how your turtles live and interact with their environment.
Choosing the right materials for your divider is key to making sure it lasts and works effectively. You can opt for acrylic, PVC, mesh, or even glass depending on your preferences and the needs of your turtles. Each material has its pros and cons, but it’s important to pick one that is durable, safe, and easy to clean. Once you’ve chosen the material, take care to measure the tank carefully and build a divider that fits well and doesn’t allow any gaps where turtles could get stuck or escape. Regular maintenance will also be necessary to keep your divider in good condition, as buildup from algae or debris can occur over time.
Remember that the goal of the divider is to provide your turtles with a comfortable living space that promotes their health and well-being. You may need to adjust the divider over time to accommodate their growth or changing needs. While a DIY divider may not be the most complex project, it can still provide a significant improvement to your turtle tank, making it more organized and better suited to the unique needs of your pets. With the right design and materials, you’ll be able to keep your turtles safe and happy in their aquatic home.

Hello,
If you enjoy the content that we create, please consider saying a "Thank You!" by leaving a tip.
Every little bit helps us continue crafting quality advice that supports the health, happiness, and well-being of pets around the world, for pets of all shapes, sizes, and species.
We really appreciate the kindness and support that you show us!