Building your own DIY slider tank is a great way to enhance your aquarium setup. With just a few materials and a bit of creativity, you can create a unique and functional tank for your aquatic friends.
To build a DIY slider tank, you need basic materials like a plastic container, aquarium sealant, and sliders. By following a few easy steps, you can assemble a functional and customizable tank to house your fish or other aquatic creatures.
This simple project will guide you through the necessary steps to create a tank that is both useful and visually appealing. You’ll be surprised by how easy it is!
Materials You’ll Need
Before you begin building your slider tank, gather all the necessary materials. You’ll need a clear plastic container with a secure lid, aquarium sealant, a sliding mechanism, and a few basic tools like a drill and scissors. You might also want to include optional decorations or plants to make your tank look even better. The clear plastic container acts as the main structure for your tank, while the sliding mechanism will allow you to access the tank easily. Aquarium sealant is crucial for securing everything and preventing leaks.
Make sure the size of the container matches the space you want the tank to occupy, as this will affect how much room your aquatic creatures will have. If you need extra space, consider using a larger container.
When picking the right container, try to find one that’s both durable and clear. This way, you’ll get a sturdy tank with an unobstructed view of the fish or plants inside. Also, ensure the container has a secure lid to prevent any escapes.
Step-by-Step Instructions
Now, let’s go over how to assemble the DIY slider tank. Start by preparing the container for the sliding mechanism. Use a drill to create small holes where the slider will attach, making sure the mechanism is aligned properly. After that, you’ll want to seal the edges of the container with aquarium sealant, ensuring that there are no leaks.
Next, carefully fit the sliding mechanism to the container. Once everything is in place, let it dry for a full 24 hours. This will ensure that the sealant has set properly and your tank won’t leak.
With your slider tank complete, you can now start customizing the inside. Add decorations, plants, and a filtration system to keep the water clean. Make sure to test the slider a few times to check if it moves smoothly.
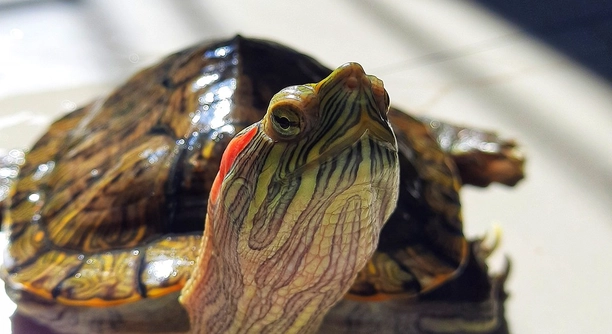
Adding Aquatic Life
Once your tank is ready, it’s time to add some life to it. Depending on the size of your tank, you can choose a variety of fish or other aquatic creatures. If you want low-maintenance options, small fish like bettas or goldfish are great choices. Be sure to add a small filter to ensure that the water stays fresh and clean for your aquatic animals.
Keep an eye on the water quality. Over time, you may need to replace the filter or clean the tank to prevent any build-up of debris or algae. You can also add aquatic plants for natural filtration, which helps maintain a balanced environment.
Choosing the right aquatic life for your tank is essential. Make sure the species you choose are compatible with each other and the size of your tank. This will keep the fish happy and healthy.
Installing the Sliding Mechanism
The sliding mechanism is essential for easy access to your tank. You can either purchase pre-made slider kits or make one yourself using simple materials like plastic or metal. A well-installed slider allows you to open and close the tank without hassle.
Begin by attaching the track system on both sides of your container. Use screws to secure the track firmly. If you’re using a DIY track, make sure it aligns evenly to allow smooth sliding. Once the track is in place, test the movement of the sliding door. If it sticks, make adjustments until it glides easily.
The slider should be able to move both ways without resistance. Be sure to check if the edges are sealed tightly to prevent leaks when the door is closed. A smooth sliding mechanism will help make maintenance and feeding time much more convenient.
Sealing the Tank
Sealing is crucial to ensure that your DIY slider tank holds water without any leaks. Use aquarium sealant that is safe for aquatic environments, as it is designed to withstand the moisture and pressure inside a tank.
Apply the sealant to all the edges of your container. Be thorough and make sure the entire perimeter is well sealed. If you’re using a lid, seal it properly, too, to prevent any evaporation or accidents. Once you’ve applied the sealant, allow it to dry for 24 to 48 hours, depending on the product’s instructions.
It’s essential to double-check for any gaps in the seal once the drying period is over. If you notice any leaks, apply additional sealant and wait for it to dry before testing again. The longer the sealant has to cure, the better.
Adding Decorations and Plants
Once your tank is sealed and the slider works smoothly, it’s time to make it look attractive. Adding decorations such as rocks, driftwood, or aquatic plants can create a more natural environment for your aquatic creatures.
Decorations are important not just for aesthetics, but also for providing hiding spots and stimulation for the animals. Make sure to choose materials that are safe for aquatic life. Plants, whether real or artificial, can enhance the tank’s beauty and help maintain water quality.
Consider adding low-maintenance plants like Java Fern or Anubias if you want something natural. These plants can provide shelter for your creatures and contribute to a healthier environment.
Adding Water
After decorating, it’s time to fill your tank with water. Start by adding dechlorinated water to prevent harming any fish or plants. Fill the tank slowly, ensuring that the water level stays within the container’s limit to avoid overflow.
Use a water conditioner if needed to remove harmful chemicals. Make sure the water temperature is suitable for your aquatic life by using a thermometer. Adding water gradually ensures the tank doesn’t get overloaded with too much pressure at once.
Installing the Filtration System
A filtration system will keep your tank clean and healthy. Choose a filter that matches the size of your tank to ensure it works effectively. Install the filter according to the instructions provided by the manufacturer, making sure it’s securely positioned.
Filters not only clean the water but also help oxygenate the environment, promoting the well-being of your aquatic creatures. Be mindful of the flow rate to ensure that it doesn’t create strong currents that could harm the fish. Regular maintenance of the filter is key to maintaining a clean and healthy tank.
FAQ
How do I choose the right container for my DIY slider tank?
When choosing a container, the most important factors are size, material, and durability. Opt for a clear plastic container to give you a good view of the inside. Make sure it’s big enough for your aquatic life and has enough space to install the sliding mechanism. Choose a sturdy container that can handle the water’s weight and resist cracking. It’s best to avoid thin plastic, as it might not hold up long-term. Also, check if the container is made of non-toxic materials, especially if you’re using it for fish or plants.
Can I use a glass container instead of plastic?
Yes, you can use glass, but it’s heavier and more fragile than plastic. Glass may be better for those who prefer a more polished or classic look for their slider tank. However, it will require more caution during setup to avoid breakage. If you choose glass, make sure it’s thick enough to hold water without cracking.
Do I need a filtration system in my DIY slider tank?
Yes, a filtration system is essential for maintaining a clean and healthy environment. It helps remove waste, debris, and excess nutrients that could cause algae growth or harm your aquatic life. If you’re using small fish or aquatic plants, a small internal filter should suffice. For larger tanks or more fish, you may need a larger external filter.
Can I build a slider tank for freshwater and saltwater creatures?
Absolutely. You can create a DIY slider tank for both freshwater and saltwater environments. The primary difference will be the type of equipment and water conditions. For saltwater tanks, you’ll need a saltwater filtration system, special salt mix, and a temperature-controlled environment. Freshwater tanks are generally simpler, but both types require regular monitoring and maintenance.
How do I know if my tank is properly sealed?
After sealing the tank, fill it with water and let it sit for a day or two to check for leaks. Pay close attention to the bottom and edges, where leaks are most likely to occur. If you notice any dampness around the edges or water pooling at the base, it may need additional sealing. Make sure to test the seal several times before adding fish or plants.
What type of slider mechanism should I use?
The best slider mechanism will depend on your design and the materials you use. Some people prefer using a plastic sliding track, while others use metal or wooden frames. The key is to ensure the track is securely fastened to prevent the door from falling off and that it slides smoothly. You can purchase pre-made slider kits, or if you’re DIY-savvy, you can create your own from basic materials like PVC pipes or metal rods.
How long will my DIY slider tank last?
If constructed properly, your slider tank can last for many years. However, its lifespan depends on factors like the material you use, how well it’s sealed, and how often you maintain it. Plastic containers may last a decade or more, while glass tanks can last even longer if treated carefully. The sliding mechanism may need maintenance over time, such as oiling or adjusting, but with regular care, the tank should hold up well.
Do I need a lid for my slider tank?
It’s a good idea to use a lid, especially if your aquatic creatures could potentially jump out or if you want to control evaporation. A lid will also help maintain a stable environment by keeping the water temperature consistent and reducing debris from entering. Make sure the lid is secure and that it doesn’t interfere with the sliding mechanism.
Can I add live plants to my DIY slider tank?
Yes, live plants can greatly enhance your slider tank. They provide natural filtration, improve water quality, and give fish a more natural environment. However, live plants require proper lighting and, depending on the species, may need occasional pruning or fertilizing. Choose low-maintenance plants if you’re new to aquarium care.
What is the best way to clean my DIY slider tank?
To clean the tank, start by removing any debris or waste with a net. Then, use an aquarium-safe scrub brush to clean the inside of the tank, including decorations, plants, and the glass. Regular water changes are essential for keeping the tank healthy. If your tank has a filter, clean it regularly as well. Be sure to clean the sliding mechanism so that it moves smoothly.
How often should I change the water in my slider tank?
Water changes should be done regularly, but how often depends on the size of the tank and the number of creatures inside. For small tanks, changing 10-20% of the water every week should suffice. Larger tanks may require water changes every two weeks. Monitor water parameters like ammonia, nitrites, and nitrates to decide when a change is necessary.
Can I use my DIY slider tank for breeding fish?
Yes, you can use the slider tank for breeding fish, but it’s important to create the right environment. Depending on the species of fish you want to breed, you may need to adjust the water temperature, pH, and lighting. Breeding tanks typically have more hiding spaces for the fry and require separate areas for the parents to avoid aggression. Ensure the tank is stable and monitor water quality closely.
What should I do if the slider mechanism gets stuck?
If the slider mechanism gets stuck, check for any debris or obstructions in the track. Make sure the track is aligned properly and hasn’t shifted over time. If needed, clean the track and apply some lubrication to ensure smooth movement. You may also want to double-check the sealant around the edges to ensure it’s not affecting the slider’s movement.
How do I know if my tank is safe for the aquatic life?
Your tank will be safe for aquatic life if you’ve ensured the following: proper sealing, no harmful chemicals, stable water temperature, and a clean filtration system. Additionally, make sure the tank is not overcrowded, and check for any sharp edges that could harm the creatures. Regularly monitor the health of your aquatic life to spot potential problems early.
Building a DIY slider tank is an achievable and rewarding project for anyone interested in creating a custom aquarium. With just a few materials, such as a plastic container, sliding mechanism, sealant, and decorations, you can build a functional and attractive tank for your aquatic life. The process is straightforward, but it does require some patience and attention to detail. Ensuring that the tank is properly sealed, the sliding mechanism works smoothly, and the tank is properly prepared with water and filtration will ensure that your slider tank lasts for years to come.
One of the great things about building your own slider tank is the ability to customize it according to your needs. Whether you’re keeping small fish, plants, or other aquatic creatures, you can choose the size and layout that best suits your space and preferences. You can also adjust the type of sliding mechanism and materials you use to match your desired look and functionality. Plus, adding decorations and live plants can enhance the tank’s appearance and provide a more natural environment for your aquatic life.
Regular maintenance is essential to keep your tank healthy. This includes checking the water quality, replacing the filter when necessary, and cleaning both the tank and the sliding mechanism. Keeping an eye on the temperature, water level, and condition of your aquatic life will help prevent any issues. While the DIY slider tank is a simple project, maintaining it ensures the well-being of your aquatic creatures. If done correctly, your tank will not only be a functional addition to your home but also a peaceful environment for the creatures that live in it.

Hello,
If you enjoy the content that we create, please consider saying a "Thank You!" by leaving a tip.
Every little bit helps us continue crafting quality advice that supports the health, happiness, and well-being of pets around the world, for pets of all shapes, sizes, and species.
We really appreciate the kindness and support that you show us!