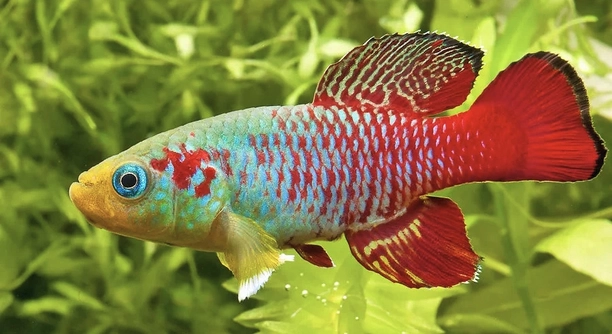
Hatching killifish eggs can be a rewarding experience for many hobbyists. These delicate eggs need special care to prevent fungus from ruining the batch. Knowing the right steps helps ensure a healthy hatch and strong fry.
The key to hatching killifish eggs without fungus lies in maintaining proper humidity, temperature, and cleanliness. Using a damp peat moss or sponge substrate and monitoring conditions closely prevents fungal growth. Timely removal of any affected eggs also reduces the risk.
Understanding these basic principles will help you avoid common pitfalls and successfully raise killifish fry. The following guide explains the process in simple steps.
Preparing the Right Environment for Killifish Eggs
Creating the ideal environment for killifish eggs is crucial for preventing fungus. I use damp peat moss because it holds moisture well without becoming soggy, which stops fungus from growing. The moss needs to be moist but not wet, so checking it daily is important. Temperature also plays a big role; I keep it steady between 70 and 75 degrees Fahrenheit. Too much heat or cold can cause problems. Keeping the eggs in a clean container is necessary, and I make sure to wash my hands before handling anything to avoid introducing bacteria or fungus. Using a small fan or gentle air circulation helps reduce stagnant air, which fungi love. This setup helps the eggs stay healthy during incubation.
Maintaining a consistent moisture level and temperature is key to a fungus-free hatching environment.
Keeping these conditions steady avoids mold and helps the eggs develop normally. Regular checks prevent surprises and make the process smoother. When fungus appears, removing affected eggs quickly keeps the batch safe. This careful attention makes hatching killifish eggs more successful and rewarding.
Monitoring and Removing Fungus Early
Detecting fungus early is essential to protect the remaining eggs. Fungus looks like a white, cottony growth and spreads quickly if not handled.
When I spot fungus, I gently remove the infected eggs right away using tweezers. It’s important to handle the eggs carefully to avoid damaging healthy ones. Cleaning the container and replacing the moss or substrate after removal helps reduce spores. Some keepers use mild antifungal solutions, but I prefer natural methods first, like improving airflow and lowering humidity slightly. Avoid overcrowding eggs, as too many in one place increase fungus risk. Consistent inspection every day is the best way to catch issues early and save as many eggs as possible.
With patience and attention, it’s possible to keep fungus under control and improve hatching success rates. This simple approach helps maintain a clean and healthy environment for killifish eggs.
Handling Killifish Eggs During Transfer
Transfer eggs gently to avoid damage. Use soft tweezers or your fingers with care. Wet your hands or tools before touching eggs to reduce stress.
Handling eggs with care lowers the chance of breakage and infection. I always prepare a clean container with moist peat moss ready to receive the eggs. Moving eggs slowly and steadily helps keep them intact. Avoid shaking or dropping them during the process. Keeping eggs moist during transfer is essential; drying out can harm development. I prefer transferring eggs one by one when possible to keep track of their condition and reduce risks.
Once transferred, I place the container in a quiet, stable area away from direct sunlight or drafts. This setup keeps conditions consistent and helps eggs develop without stress or interruptions.
Ideal Conditions for Hatching Killifish Eggs
Temperature control is crucial, ideally between 72 and 75 degrees Fahrenheit. Humidity should be high but not excessive.
Maintaining stable temperature and humidity supports healthy embryo growth. I use a thermometer and hygrometer to monitor conditions closely. If humidity drops, I lightly mist the peat moss to keep it moist but not soggy. Fluctuations in temperature can cause developmental issues or encourage fungus, so I avoid sudden changes by keeping the container in a consistent environment. Proper ventilation also helps prevent fungal growth without drying out the eggs. I adjust conditions gradually if needed, paying attention to the eggs’ appearance and firmness. This balance improves hatch rates and keeps embryos healthy until they’re ready to swim freely.
Keeping Eggs Moist Without Overwatering
Eggs must stay moist but not soaked. Too much water invites fungus, which can quickly ruin the batch.
I gently mist the substrate with water when it feels dry. Using a spray bottle helps control moisture evenly without flooding the eggs.
Choosing the Right Substrate for Killifish Eggs
Peat moss is the preferred substrate because it retains moisture while allowing air circulation. It mimics the natural environment where killifish lay eggs. Using fresh, untreated peat moss reduces the risk of contamination and fungus. Some keepers use coconut fiber as an alternative, but it needs careful monitoring to avoid drying out or becoming too wet. The substrate should be loose enough to let embryos breathe but firm enough to hold eggs in place. Proper substrate choice supports healthy development and helps prevent fungal growth during incubation.
Watching for Signs of Fungus
Fungus appears as fuzzy white patches on eggs and substrate. Early removal is necessary to protect healthy eggs.
FAQ
How do I know if killifish eggs are healthy?
Healthy killifish eggs usually look clear or slightly amber, depending on the species. They should be firm and not shriveled or soft. A healthy egg will not have fuzzy or white spots, which indicate fungus. I check eggs daily to catch any changes early and remove any that look unhealthy.
Can I hatch killifish eggs directly in water?
Some killifish species can hatch directly in water, but many annual killifish require dry incubation on a moist substrate like peat moss. Hatching eggs in water without proper preparation may increase fungus risk. Following species-specific guidelines ensures better success rates.
What temperature is best for killifish egg incubation?
The ideal temperature range is between 70 and 75 degrees Fahrenheit. I keep my incubation setup stable within these limits to avoid slowing development or encouraging fungus growth. Sudden temperature shifts can stress the embryos and cause problems.
How long does it take for killifish eggs to hatch?
Hatching time varies by species and temperature but usually takes between 2 to 4 weeks. Warmer temperatures tend to speed up development, while cooler ones slow it down. Patience is important because rushing or disturbing the eggs can harm the embryos.
How often should I check the eggs during incubation?
Checking the eggs once a day is usually enough. This lets you spot fungus or dead eggs early and remove them to protect the rest. Over-handling can damage the eggs, so I try to be gentle and quick during inspections.
What do I do if fungus starts growing on the eggs?
Remove the infected eggs carefully with tweezers to prevent fungus from spreading. Replace or clean the substrate if needed and improve airflow around the eggs. Some people use mild antifungal treatments, but I prefer natural control first by adjusting moisture and ventilation.
Can I use antifungal chemicals on killifish eggs?
Using antifungal chemicals is risky because it can harm the developing embryos. I avoid chemicals unless absolutely necessary and prefer to manage fungus by controlling moisture and temperature. If you choose to use treatments, research the product thoroughly and use sparingly.
Is it normal for some eggs not to hatch?
Yes, it is common for a portion of the eggs not to hatch. Some eggs may be infertile or damaged. Removing dead or unhealthy eggs improves the chances for the rest. Accepting a small loss is part of the process when hatching killifish eggs.
How should I store eggs if I can’t hatch them immediately?
Keep eggs on moist peat moss in a cool, dark place around 70 degrees Fahrenheit. Avoid letting the substrate dry out or become too wet. Proper storage can keep eggs viable for weeks or even months, depending on the species.
What are signs that embryos are developing inside the eggs?
As embryos develop, you may see small dark spots or movement inside the eggs. This indicates healthy growth. If eggs remain clear without changes after a long period, they might be infertile or dead.
When should I move eggs to water for hatching?
Move eggs to water when they show signs of full development, like visible eyes or movement inside. This timing varies by species and conditions but usually happens after the incubation period. Gentle transfer to clean, dechlorinated water encourages successful hatching.
Can I hatch killifish eggs with multiple species together?
It’s best to keep species separate to avoid confusion and ensure proper care. Different species have varied needs for temperature, moisture, and incubation time. Mixing eggs can lead to poor results and difficulties identifying fry.
How do I care for the fry once they hatch?
Feed the fry tiny live foods like microworms or infusoria for the first few days. Keep water clean and maintain gentle filtration. Fry are delicate, so avoid strong water currents and sudden changes in water conditions. Regular feeding and water changes support healthy growth.
What mistakes should I avoid when hatching killifish eggs?
Avoid letting the substrate dry out or become too wet. Don’t expose eggs to extreme temperatures or sudden changes. Handle eggs gently and inspect them regularly without disturbing them too much. Removing fungus quickly and maintaining cleanliness are also important steps.
Can I reuse substrate after hatching?
Reusing substrate is not recommended unless thoroughly cleaned and sterilized. Old substrate may harbor fungus spores or bacteria that threaten new eggs. Using fresh peat moss or fiber ensures a cleaner, safer environment.
How do I tell if fungus is gone?
Fungus disappears when white fuzzy growth stops spreading and infected eggs are removed. The substrate should look clean and healthy. Continuous good airflow and proper moisture help keep fungus from returning. If fungus persists, review your setup and adjust conditions accordingly.
Are there any special tools needed for hatching killifish eggs?
Basic tools include soft tweezers, a spray bottle for misting, a thermometer, and a hygrometer. These help with gentle handling and maintaining proper conditions. Clear containers with lids also make it easier to monitor eggs without exposing them too much.
Can I hatch killifish eggs without peat moss?
Peat moss is preferred but not mandatory. Some use sponges, paper towels, or coconut fiber as alternatives. These must keep moisture stable and allow air circulation. Experiment carefully if using alternatives to avoid fungus and egg damage.
Hatching killifish eggs without fungus requires patience and careful attention to detail. It is important to create the right environment, including maintaining proper moisture and temperature levels, to prevent fungal growth. Using a moist substrate like peat moss helps keep the eggs healthy during incubation. Regularly checking the eggs for any signs of fungus or damage allows for early removal of affected eggs, which protects the rest of the batch. This ongoing care plays a crucial role in the success of hatching killifish eggs.
Handling the eggs gently is also essential. Using soft tweezers or wet fingers reduces the risk of harming the delicate eggs. When transferring eggs to a new container or substrate, it’s best to do so slowly and carefully to avoid stress or damage. Stable conditions, such as consistent temperature and humidity, support the development of embryos. Avoiding sudden changes in the environment helps prevent fungus and encourages healthy growth. Proper ventilation without letting the substrate dry out also helps maintain the balance needed for eggs to hatch successfully.
Following these basic guidelines can improve hatch rates and reduce the risk of fungus. Although some eggs may not hatch, managing the environment and removing fungus early greatly increases the chances of success. Keeping the eggs moist but not soaked, providing steady temperature, and inspecting regularly are simple but effective steps. With patience and careful monitoring, hatching killifish eggs without fungus becomes a manageable and rewarding process. These practices create the best possible conditions for your killifish eggs to develop and hatch into healthy fry.

Hello,
If you enjoy the content that we create, please consider saying a "Thank You!" by leaving a tip.
Every little bit helps us continue crafting quality advice that supports the health, happiness, and well-being of pets around the world, for pets of all shapes, sizes, and species.
We really appreciate the kindness and support that you show us!