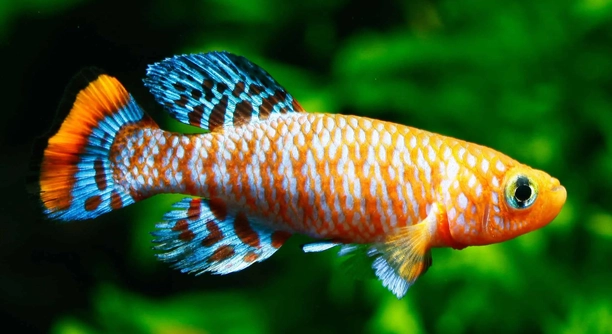
Killi fish are popular among aquarium enthusiasts for their vibrant colors and unique breeding habits. Many keepers enjoy watching their eggs develop and hatch. However, it can be frustrating when those eggs do not hatch as expected.
When killi eggs fail to hatch, it is often due to factors such as improper water conditions, fungal infections, or incorrect incubation temperature. Ensuring a clean environment and stable parameters is essential to improve hatching success.
Knowing how to address these common issues can help you protect your eggs and support the healthy growth of your killi fry. This article offers practical steps to help you manage unhatched eggs effectively.
Common Reasons Killi Eggs Don’t Hatch
Killi eggs are sensitive to several environmental factors that can prevent them from hatching. One major issue is water quality. If the water contains too many impurities or has incorrect pH levels, eggs may fail to develop properly. Temperature is also critical; eggs require a stable range, usually between 22 to 26°C (72 to 79°F), to incubate successfully. Sudden temperature changes or extremes can stop development altogether. Fungal infections are another frequent problem. Fungus can spread rapidly across eggs, suffocating the embryos inside. Overcrowding or poor aeration can worsen this issue. Additionally, eggs that are not properly separated or removed from adults may be eaten or damaged. Handling eggs gently during any cleaning or relocation is essential. Taking care of these factors early increases the chances of healthy hatching.
Maintaining proper water conditions and monitoring eggs closely helps reduce these problems and supports better hatching results.
Dealing with unhatched eggs can be discouraging, but addressing water quality, temperature, and fungus promptly makes a significant difference. Consistency in tank maintenance and careful observation allow you to catch problems early and take action. This reduces stress for the fish and improves egg survival rates. Proper care means cleaning the tank regularly, avoiding sudden temperature shifts, and using antifungal treatments if needed. Removing dead or infected eggs quickly prevents fungus from spreading. Using a breeding mop or spawning substrate can protect eggs from adults and increase safety. Each step helps create an environment where your killi eggs have the best chance to hatch successfully.
How to Rescue Unhatched Killi Eggs
Rescuing killi eggs requires prompt action once you notice they are not developing. Carefully remove the eggs from the main tank using a soft brush or tweezers, taking care not to damage them. Place the eggs in a separate container with clean water matching the original tank’s temperature and pH. This reduces risk from fungus and adult fish interference. Adding a small amount of methylene blue or antifungal medication to the water can help prevent fungal growth. Gently aerate the water to maintain oxygen levels but avoid strong currents. Monitor the eggs daily, removing any that turn white or fuzzy as those are dead and can infect others. Patience is important since some eggs may take longer to hatch depending on conditions.
Following these steps improves the chances of salvaging your killi eggs and helps more fry survive to grow. Being methodical and gentle throughout the process is key to success.
Preventing Future Hatching Problems
Keeping water parameters stable is essential to prevent egg failure. Regular testing for pH, ammonia, nitrite, and nitrate helps maintain a safe environment. Temperature should remain consistent without sudden changes. Avoid overcrowding the breeding tank to reduce stress on the adults and damage to the eggs.
Proper tank setup includes using a spawning mop or fine-leaved plants to protect eggs. Removing adults after spawning prevents them from eating the eggs. Clean the tank gently and avoid harsh chemicals that could harm the developing embryos. Using antifungal treatments early can stop fungus from spreading and damaging eggs.
Routine observation is important. Check eggs daily for any signs of fungus or discoloration. Remove dead eggs immediately to protect healthy ones. Adjust water flow to avoid disturbing eggs while ensuring sufficient oxygen. Taking these precautions increases the likelihood of successful hatching and healthy fry development.
Handling Unhatched Eggs with Care
Eggs are fragile, and rough handling can easily damage them. Use soft tools like a fine brush or tweezers to move eggs carefully. Avoid touching eggs with bare hands as oils or contaminants can harm them. When transferring eggs, ensure the new water matches the original tank’s temperature and chemistry to prevent shock.
If eggs show no signs of development after several days, separating them from the main tank helps control fungus and predators. Maintain gentle aeration and treat the water with antifungal agents if necessary. Keep the container clean and monitor the eggs closely, removing any that become cloudy or fuzzy. Patience is vital, as some eggs hatch slower depending on species and conditions. This careful approach gives unhatched eggs a better chance to develop successfully.
Signs That Eggs Are Not Viable
Unviable killi eggs often turn white or cloudy within a few days. This discoloration indicates that the embryo inside has died. Another sign is fuzzy or cotton-like growth on the eggs, which signals fungal infection.
Dead eggs may also become soft or shriveled. Removing these eggs quickly prevents fungus from spreading to healthy ones. Careful daily inspection is necessary to maintain egg health and improve hatching chances.
Optimal Incubation Conditions for Killi Eggs
Maintaining a stable temperature between 22 and 26°C (72 to 79°F) is crucial for killi egg development. Water should be clean with low ammonia and nitrite levels. Slight aeration helps provide oxygen but avoid strong currents that could dislodge the eggs.
Using antifungal agents like methylene blue can prevent infections during incubation. Regular water changes with careful attention to matching temperature and pH help sustain healthy conditions. Proper incubation environments promote higher hatch rates and stronger fry.
Using Antifungal Treatments Safely
Antifungal treatments must be used carefully to avoid harming embryos. Methylene blue is commonly recommended in low concentrations. Follow product instructions closely and avoid overdosing. Regular monitoring ensures treatments are effective without negative effects on eggs or fry development.
FAQ
Why are my killi eggs not hatching after several weeks?
Killi eggs usually hatch within 10 to 14 days, depending on the species and water temperature. If eggs remain unhatched for weeks, it often means the embryos did not develop properly. This can be due to poor water quality, incorrect temperature, or fungal infections. Dead eggs tend to turn white or develop fungus, which prevents hatching. Checking and adjusting tank conditions early can help prevent long delays in hatching.
Can I save killi eggs that look white or fuzzy?
Once eggs turn white or fuzzy, they are usually dead and infected with fungus. It is best to remove these eggs immediately to stop fungus from spreading to healthy eggs. Fungus grows quickly and can destroy the entire batch. While antifungal treatments help prevent fungus, they cannot revive dead eggs.
How do I prevent fungus on killi eggs?
Prevent fungus by maintaining clean water and good aeration. Using antifungal agents like methylene blue in low concentrations can protect eggs during incubation. Removing any dead eggs quickly reduces fungal spread. Avoid overcrowding and keep water parameters stable to minimize stress, which lowers the risk of fungal infections.
Should I remove adult fish after spawning?
Yes, removing adult killi fish after they lay eggs is important. Some adults may eat or damage the eggs. Separating adults also prevents disturbance to the eggs during their delicate incubation period. Using a breeding mop or spawning substrate helps protect eggs and makes removal easier.
What water conditions are best for incubating killi eggs?
Ideal water conditions include a stable temperature between 22 and 26°C (72 to 79°F), pH around neutral, and very low levels of ammonia and nitrite. Clean water with regular gentle aeration provides necessary oxygen without dislodging eggs. Consistent monitoring and water changes help maintain these conditions.
Can I hatch killi eggs outside the main tank?
Yes, transferring eggs to a separate container can increase survival rates. This isolates eggs from fungus, predators, and adult fish that may harm them. Use water from the original tank to avoid shock, and add a small amount of antifungal treatment. Gentle aeration and careful monitoring are essential.
How often should I check killi eggs?
Daily checks are recommended to spot early signs of fungus or dead eggs. Removing affected eggs quickly helps protect the healthy ones. Consistent observation also allows adjustments in water conditions if necessary. Monitoring during the entire incubation period improves hatch success.
What happens if I disturb the eggs too much?
Excessive handling or strong water flow can damage eggs or dislodge them from their safe spots. This can lead to death or fungal infection. Handle eggs gently using soft tools and avoid sudden movements. Keep water currents low to moderate around eggs to prevent disturbance.
Is temperature fluctuation harmful to killi eggs?
Yes, sudden changes in temperature can stop embryo development or kill the eggs. Keeping the temperature stable within the recommended range supports proper growth. Using a reliable heater and thermometer helps maintain consistent conditions throughout incubation.
How long do killi eggs take to hatch?
Most killi species’ eggs hatch within 10 to 14 days, but timing varies with temperature and species. Cooler temperatures slow development, while warmer ones speed it up. If eggs do not hatch after three weeks, they are likely nonviable. Patience is important, but long delays usually mean problems with the eggs.
Killi fish eggs can be delicate and sometimes challenging to hatch successfully. Many factors influence whether the eggs develop properly or fail to hatch. Water quality, temperature, and cleanliness play a large role in this process. Eggs require stable conditions to grow, and sudden changes can harm the embryos. Fungal infections are also common and need to be controlled quickly to prevent loss. Taking time to understand these needs and paying close attention to the environment will improve the chances of seeing healthy fry.
It is important to handle eggs with care when moving or cleaning around them. Rough handling or exposing them to contaminants can damage the embryos inside. Using gentle tools and avoiding direct contact with hands helps protect the eggs. If eggs do not seem to develop or start showing signs of fungus, removing affected eggs right away can stop the problem from spreading. Sometimes, moving eggs to a separate container with controlled conditions can increase survival rates. This extra step requires patience but often results in better outcomes.
Overall, patience and consistent care are key when working with killi fish eggs. Monitoring water parameters, removing dead eggs promptly, and providing stable temperatures make a significant difference. Problems will occur from time to time, but learning to recognize and address them early helps protect the eggs and future fry. By following these practices, it is possible to improve hatching success and enjoy the rewarding experience of raising healthy killi fish.

Hello,
If you enjoy the content that we create, please consider saying a "Thank You!" by leaving a tip.
Every little bit helps us continue crafting quality advice that supports the health, happiness, and well-being of pets around the world, for pets of all shapes, sizes, and species.
We really appreciate the kindness and support that you show us!