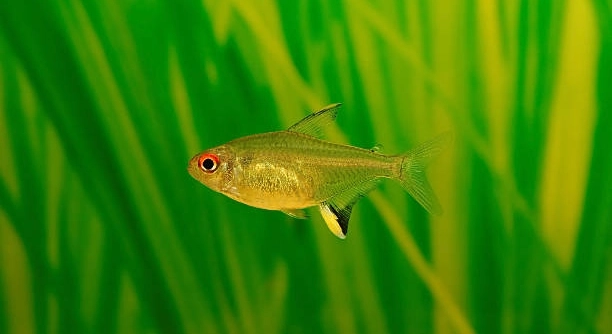
Capturing clear photos of arowanas can be challenging, especially for those who are new to keeping these beautiful fish. Many aquarists want to showcase their pets while ensuring the fish remain safe and calm during photography sessions.
Arowana photography requires careful handling, proper lighting, and minimal stress to the fish. Maintaining a safe distance, avoiding sudden movements, and using gentle techniques can help capture detailed images while preserving the fish’s health and well-being.
Learning simple strategies can make photographing your arowana safer and more enjoyable, helping you achieve beautiful results without compromising your fish’s comfort.
Preparing Your Tank for Photography
Before taking photos of your arowana, it is important to prepare its tank properly. Start by cleaning the glass to remove any water spots, algae, or fingerprints that can affect image clarity. Clear water is essential, as murky or cloudy water reduces visibility and makes focusing difficult. Adjusting the lighting is equally important. Use natural light when possible, positioning the tank near a window while avoiding direct sunlight that can stress the fish. If using artificial light, choose soft, even lighting to prevent harsh reflections. Remove unnecessary decorations or clutter that could distract from the fish or cause shadows. Ensure the fish has enough space to move comfortably, which reduces stress and improves natural posture. By preparing the tank thoughtfully, you create a safer and more visually appealing environment, which helps capture the fish’s colors, scales, and movements more effectively during the photo session.
Proper preparation prevents stress and helps you take sharper, more vivid images. Clean glass and controlled lighting make a noticeable difference.
Taking the time to adjust the tank environment before photographing your arowana ensures both safety and quality. A clean, clear tank with even lighting allows the fish to display its natural colors and elegant movements without being startled or constrained. Removing excess decorations creates a neutral backdrop that highlights the fish. When the arowana is calm, it is easier to capture detailed shots of its scales, fins, and eyes. Maintaining a comfortable water temperature and avoiding sudden changes during photography keeps stress low. Even small adjustments, such as angling lights or wiping the glass, can significantly improve results. Preparing the tank properly is a simple but effective step to ensure safe, professional-looking photos. Over time, these practices will make photographing your arowana smoother, creating images that showcase the fish’s natural beauty while keeping it relaxed and healthy.
Using a Camera and Lens Correctly
Using the right camera settings is key for clear, detailed shots of your arowana.
Choosing a camera with a fast shutter speed helps capture movement without blur. Pair it with a lens that allows for close-ups while keeping distance to avoid disturbing the fish. Adjust ISO and aperture to maintain proper exposure and depth of field. Avoid using flash directly on the tank, as it can startle the fish and create reflections. Continuous focus mode helps track your arowana if it moves across the tank. Small adjustments to camera angle and distance make a noticeable difference in highlighting details like scale patterns and fin shapes.
Selecting the correct lens and settings helps produce crisp, high-quality images without causing stress. Experimenting with angles and focus distances enhances both clarity and composition.
The camera plays a critical role in safely photographing your arowana. Using a lens that allows you to shoot from a distance prevents the need to tap on the glass or get too close, which can frighten the fish. Setting the camera to fast shutter speed freezes movement, capturing sharp images of even sudden flicks of the tail. Proper ISO settings maintain brightness without adding noise, while aperture control ensures important features remain in focus. Avoiding flash directly on the tank reduces reflections and stress. Continuous autofocus tracks the fish if it swims across the tank. Adjusting angles, height, and distance provides different perspectives, highlighting the fish’s length, fin spread, and vibrant scales. Careful camera use, combined with a calm environment, ensures your photos are safe, detailed, and visually appealing while keeping your arowana comfortable throughout the session.
Keeping the Fish Calm
Minimizing sudden movements around the tank helps the arowana stay calm. Gentle hand movements and slow adjustments to equipment reduce stress, making it easier to get clear shots without startling the fish.
A calm arowana shows its natural posture and color more effectively. Sudden noises, tapping on the glass, or rapid movements can trigger stress responses, causing the fish to hide or swim erratically. Limiting disturbances during photography sessions helps the fish remain relaxed. Providing a consistent environment with stable water temperature and lighting also contributes to a calmer fish. A quiet, steady approach allows you to capture sharp images while ensuring the arowana’s well-being. Regular observation helps you learn how the fish reacts to different situations.
Using familiar surroundings reduces the fish’s stress further. Consistency in timing, light exposure, and tank conditions allows the arowana to anticipate minimal disruption, improving both its comfort and the quality of your photos. Observing the fish’s behavior before and during shooting helps predict movement and position, making it easier to frame shots. Patience is key; rushing the process can lead to blurred images and increased stress. Incorporating gentle routines, such as adjusting lighting slowly and avoiding sudden gestures, keeps the fish composed. Over time, these careful methods help the arowana associate photography sessions with minimal disturbance, allowing natural behavior to be captured more effectively and safely.
Using Reflections and Angles
Reflections on the tank glass can ruin images, so adjust your shooting angle and light placement. Positioning the camera slightly off-center reduces glare and unwanted reflections.
Experimenting with angles allows for more dynamic shots of the arowana. Shooting from above, slightly to the side, or even from a low angle can highlight the fish’s body shape and fin structure. Reflections from lights or surroundings can distort colors, so reposition light sources or use a polarizing filter when possible. Subtle adjustments in camera placement help avoid capturing your own reflection or objects behind the tank, keeping the focus entirely on the fish. Moving slowly while testing different perspectives often yields the most appealing images, showing unique details without compromising safety.
Lighting direction and camera placement directly affect how the arowana appears in photographs. Positioning lights to the side or slightly behind the fish enhances scale texture and color depth while reducing glare. Using the tank’s environment creatively, such as incorporating soft background gradients, adds interest without distracting from the subject. Polarizing filters and lens hoods can minimize reflections and ensure colors remain true. Adjusting camera height and angle captures different perspectives, from full-body shots to close-ups of the fins and head. Experimenting with these techniques produces professional-looking photos while keeping the fish comfortable. Small, careful movements prevent startling the arowana and allow natural behavior to be photographed effectively.
Timing Your Photos
Arowanas are most active during certain times of the day. Observing their routine helps capture natural, dynamic poses without causing stress.
Early morning or late afternoon often provides the best natural light. Photographing during these times enhances color and reduces glare while the fish is calm and active.
Avoiding Flash
Direct flash can startle the fish and create harsh reflections. Using natural or diffused light is safer and produces clearer images. Adjusting light intensity gradually helps maintain the fish’s comfort and reveals true colors without causing sudden stress.
Post-Processing Basics
Minor edits can enhance your photos without altering the fish’s natural appearance. Adjust brightness, contrast, and sharpness carefully. Avoid heavy filters that distort colors or textures, keeping the image realistic while highlighting the arowana’s features.
Handling Equipment Safely
Keep cameras and other tools outside the tank. Avoid leaning or placing equipment on the glass, which could startle or harm the fish. Small adjustments should be made gently to maintain a safe environment.
FAQ
How can I make my arowana feel comfortable during a photo session?
Keeping the environment quiet and stable is key. Avoid sudden movements or loud noises around the tank. Ensure water temperature and lighting remain consistent. Giving the fish time to adjust to your presence helps it stay calm. Slow, deliberate actions when moving equipment or adjusting lights prevent stress. Observing the fish’s behavior allows you to notice signs of agitation and pause if needed. Over time, the arowana becomes more relaxed, making photography easier and safer while showing its natural colors and movements.
What type of lighting works best for arowana photography?
Soft, even lighting produces the most natural results. Natural light from a window works well if direct sunlight is avoided. Artificial lights should be diffused to prevent harsh reflections on the glass and scales. Avoid using the camera flash directly, as it can startle the fish and create glare. Position lights at angles that highlight the fish’s colors and textures without causing shadows or reflections. Experimenting with side lighting or low-angle lighting can create depth while keeping the fish comfortable and stress-free.
Which camera settings are ideal for capturing arowanas?
A fast shutter speed is essential to freeze movement, especially if the fish swims quickly. Set ISO to maintain brightness without adding noise, and adjust aperture for proper depth of field. Continuous autofocus helps track movement across the tank. Avoid high ISO in low-light situations to prevent grainy images. Using a lens that allows for close-ups from a safe distance ensures sharp details without disturbing the fish. Testing different angles and distances will help find the best combination for clarity and composition.
How can I reduce reflections and glare on the tank glass?
Positioning the camera slightly off-center and adjusting the angle of lighting minimizes reflections. Using a polarizing filter on the lens can further reduce glare. Wiping the glass clean before photographing prevents water spots and fingerprints from appearing. Avoid capturing reflections of yourself, surroundings, or equipment by adjusting your position. Even small shifts in camera height or angle can dramatically improve image clarity. Controlled lighting and careful placement help maintain the focus on the arowana without unwanted distractions or visual interference.
Is it safe to use props or decorations in the tank during photography?
Props should be minimal to avoid stressing the fish or obstructing natural movement. Choose lightweight, smooth decorations that won’t damage fins or scales. Avoid placing items that could startle or trap the fish. Simple backgrounds and open spaces often result in better images. Consistency is important; moving or changing decorations frequently can confuse the fish and create stress. Keeping the environment familiar allows the arowana to swim naturally, which leads to more relaxed poses and clearer photographs.
How do I capture the fish’s natural colors effectively?
Lighting, tank cleanliness, and water clarity are the main factors. Soft, even light enhances scale patterns and subtle color variations. Clean glass and clear water prevent distortions. Adjust camera white balance to match the lighting conditions. Avoid post-processing that exaggerates colors, as it can misrepresent the fish. Observing the fish when it’s calm ensures its natural hues are displayed. Gradual light adjustments help maintain comfort while revealing vibrant tones without startling the fish.
Can I photograph an arowana without stressing it?
Yes, patience and preparation are crucial. Keep sessions short, provide a calm environment, and avoid sudden movements. Use a camera that allows you to shoot from a safe distance, and avoid tapping on the glass. Over time, the fish adapts to the process, resulting in relaxed behavior and natural poses. Slow, gentle handling and minimal disruption help maintain the fish’s health and reduce stress during photography.
How often should I photograph my arowana?
Limit photography sessions to avoid unnecessary stress. Occasional sessions are best, especially if the fish is not accustomed to human activity near the tank. Observe how the fish reacts and adjust frequency accordingly. Consistency in routine and lighting conditions helps the arowana feel secure. Overexposure to frequent sessions may lead to agitation or defensive behavior. Keeping sessions brief and mindful ensures both safety and high-quality images.
What if the fish keeps moving and I can’t get a clear shot?
Be patient and observe the arowana’s behavior. Wait for moments when it pauses naturally or swims predictably. Using fast shutter speed, continuous autofocus, and burst mode can help capture sharp images even during movement. Avoid chasing the fish or tapping on the glass, as it increases stress. Positioning yourself at different angles and anticipating the fish’s movement often results in successful photos. Slow, careful adjustments provide more opportunities to capture clear shots without disturbing the fish.
Are there any safety tips for handling photography equipment around the tank?
Keep cameras, tripods, and lights outside the tank to prevent accidents. Avoid leaning on or placing objects on the glass. Ensure cords are secure and won’t fall into water. Handle equipment gently to prevent vibrations or sudden impacts. Small, careful movements reduce the risk of startling the fish and maintain a safe environment. Using remote triggers or extended lenses allows photography without close contact, preserving both safety and comfort for the arowana.
This FAQ section provides guidance for maintaining safety, reducing stress, and achieving clear, vibrant images of your arowana while respecting its well-being and natural behavior.
Final Thoughts
Photographing arowanas can be a rewarding experience when done with care and attention. These fish are known for their striking appearance, graceful movements, and vibrant colors, making them ideal subjects for photography. However, capturing them safely requires more than just pointing a camera at the tank. The key is to create a calm environment where the fish feels secure. Sudden movements, loud noises, or frequent disturbances can stress the fish, leading to erratic swimming or hiding. By maintaining stable water conditions, keeping lighting gentle and even, and moving slowly around the tank, you allow the arowana to display its natural beauty without anxiety. Over time, this careful approach not only improves the quality of your photos but also helps the fish remain healthy and relaxed, which is always the primary goal.
Proper preparation of both the tank and equipment plays a crucial role in achieving good results. Cleaning the glass, removing unnecessary decorations, and ensuring the water is clear are simple steps that make a noticeable difference. Similarly, using the right camera settings, such as a fast shutter speed, appropriate ISO, and continuous autofocus, allows you to capture sharp, detailed images. Experimenting with angles, lighting placement, and lens choices helps highlight the fish’s scales, fins, and body shape without causing disruption. Avoiding direct flash is important, as it can startle the arowana and create harsh reflections on the glass. Polarizing filters, soft lighting, and careful positioning of both the camera and light sources further enhance clarity and color accuracy. These thoughtful adjustments make photographing arowanas less stressful for both the fish and the photographer while producing professional-looking results.
Finally, patience and observation are essential throughout the process. Taking the time to study your arowana’s behavior helps you understand its routine, preferred spots in the tank, and how it reacts to different stimuli. Short, well-timed sessions are more effective than long, repeated attempts that may cause stress. Watching for signs of agitation or discomfort allows you to pause and prevent harm. Over time, the fish becomes accustomed to the process, and you can capture natural poses and movements more consistently. Post-processing can enhance the images slightly, but the focus should remain on maintaining realism and highlighting the arowana’s true colors. Following these practices ensures your photography is both safe and rewarding, resulting in clear, vibrant images while prioritizing the fish’s well-being above all else.

Hello,
If you enjoy the content that we create, please consider saying a "Thank You!" by leaving a tip.
Every little bit helps us continue crafting quality advice that supports the health, happiness, and well-being of pets around the world, for pets of all shapes, sizes, and species.
We really appreciate the kindness and support that you show us!