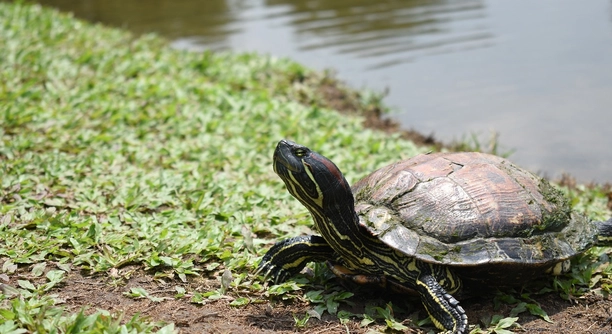
Red-eared sliders are popular pets, known for their friendly nature and fascinating behaviors. However, accidents can happen, and sometimes they may break a claw. If your red-eared slider has injured its claw, it’s important to act quickly.
To treat a red-eared slider’s broken claw, the first step is to clean the wound gently with water and a mild antiseptic. Applying a healing ointment and monitoring the claw for any signs of infection are also necessary to aid recovery.
Knowing how to properly care for a broken claw can ensure your turtle heals faster and avoids complications. By following a few key steps, you can help restore its health and comfort.
Step 1: Assess the Injury
When your red-eared slider’s claw breaks, it’s important to take immediate action. Begin by observing the injury carefully. Is the claw broken completely or just cracked? Check if there’s any bleeding. Minor injuries can often heal on their own with the right care, but if the injury is more severe, you may need to visit a vet. If there’s a lot of blood or the claw is completely detached, a professional may be required to prevent further complications.
If the injury seems minor, a careful cleaning is necessary to avoid infection. Use warm water to rinse the affected area and avoid using harsh chemicals. Gently dab the area dry using a clean towel or gauze. This step ensures that bacteria don’t enter the wound.
A calm and gentle approach is key when handling your turtle during this process. The less stressed they are, the easier it will be for both of you. Try to keep the environment quiet and peaceful while you care for the injury.
Step 2: Clean the Area Carefully
After assessing the injury, cleaning the area is essential. Make sure your red-eared slider is calm before starting the cleaning process. A clean environment will help prevent infection.
Cleaning the injured area can be done with warm water and a mild antiseptic. Avoid using strong chemicals, as these may irritate the wound. Using gauze or a soft cloth, gently clean the broken claw without causing further damage. Take extra care not to apply pressure, as it could worsen the injury.
Once cleaned, you can apply an antibiotic ointment that is safe for reptiles. Make sure the ointment is spread lightly over the injury. This will help the healing process by preventing bacterial growth. If necessary, you can wrap the claw loosely with bandages, but ensure it doesn’t restrict blood flow.
Step 3: Monitor the Healing Process
Once your red-eared slider’s injury is cleaned and treated, monitoring the healing process is crucial. Check the affected area daily for any signs of infection or swelling. If you notice anything unusual like increased redness, discharge, or a foul smell, contact your vet as these could be signs of an infection.
During the healing period, it’s important to keep the turtle’s environment clean and hygienic. This includes changing the water regularly to avoid bacterial buildup and ensuring that any substrate, like rocks or logs, doesn’t irritate the wound. Keeping the enclosure at the right temperature will also support the healing process.
While it’s tempting to check on the injury constantly, try not to disturb the turtle too much. Giving it space will allow the injury to heal without causing additional stress. It’s also important to make sure the turtle has a comfortable resting spot where it can recover.
Step 4: Prevent Future Injuries
To prevent similar injuries in the future, it’s important to review your red-eared slider’s living environment. Ensure that there are no sharp objects or areas where it could get its claws caught. Smooth, non-abrasive surfaces will be much safer for the turtle.
You should also keep an eye on how your turtle interacts with its surroundings. If there’s any chance of rough play or scratching against hard objects, try to rearrange its habitat. This proactive step will help keep your red-eared slider safe from future injury.
Additionally, consider providing a proper diet and supplements that promote healthy bone and nail growth. By maintaining your turtle’s health overall, you’ll reduce the risk of weak nails that may be more prone to injury.
Step 5: When to Visit a Vet
If the injury doesn’t seem to improve after a few days or gets worse, it may be time to consult a vet. A professional will be able to assess the severity of the injury and provide the appropriate treatment. You can also seek a vet’s help if your turtle appears to be in pain, or if the infection worsens despite your home treatment efforts.
A veterinarian experienced with reptiles will know how to properly care for the claw, possibly recommending additional treatments like oral antibiotics or a special bandage. In some cases, a surgical procedure may be necessary, especially if the claw is severely broken or infected.
While most minor injuries heal well with proper care, it’s always better to err on the side of caution. A vet will be able to guide you and offer reassurance, especially if you’re unsure about the progress of the injury.
Step 6: Provide Comfort During Recovery
After treating the injury, providing your red-eared slider with a comfortable space is essential. Make sure its habitat is quiet and free from stressors. Keeping the environment calm allows your turtle to focus on healing. A peaceful atmosphere will support its recovery without added pressure.
The right temperature is also vital during recovery. Ensure the water temperature is appropriate, as this affects circulation and healing. Additionally, providing a soft resting area can help prevent further strain on the broken claw. Avoid letting your turtle climb or use its claws too much while it heals. Creating a low-stress environment will speed up the process.
Make sure your red-eared slider’s diet is also well-balanced, as proper nutrition can help in the healing process. Ensure access to fresh water and any necessary supplements to support its immune system. A healthy diet will provide the energy needed for recovery.
Step 7: Preventing Future Claw Injuries
After dealing with a broken claw, it’s important to take steps to prevent future injuries. One way is by removing any sharp objects from your turtle’s habitat that could cause harm. Smooth surfaces and edges will reduce the risk of scratching or breaking the claws.
You should also ensure that your red-eared slider has a proper diet to promote healthy claws and shells. A lack of calcium or other essential nutrients can lead to weak claws, increasing the risk of breakage. Offering high-quality food and the right supplements will contribute to overall health.
Providing enough space and enrichment in the enclosure can also prevent overexertion or unnecessary stress on your turtle’s claws. Regularly checking for hazards in the tank will keep your turtle’s environment safe, ensuring that it stays healthy and injury-free.
Step 8: Keep the Claw Dry
After cleaning the injured claw, it’s important to keep it dry to avoid further complications. Moisture can promote bacterial growth and slow healing. Ensure the area remains dry, especially when your turtle is out of the water for treatment. This will help prevent infection and allow the injury to heal properly.
If your turtle has access to water during recovery, be mindful of the cleanliness. Change the water frequently to reduce the chance of introducing bacteria. It’s best to avoid soaking the injured claw for long periods. Gently pat the area dry after each water exposure to ensure it stays clean.
Step 9: Be Patient and Observe Progress
Healing takes time, so it’s important to be patient with your red-eared slider. Claws typically take a few weeks to heal, depending on the severity of the injury. During this time, monitor your turtle closely and avoid handling it too much. You want to prevent unnecessary stress or movement that could hinder recovery.
Keep track of any changes in the injury and how your turtle is behaving. If the injury shows signs of improvement, that’s a good sign that healing is on track. However, if things worsen, don’t hesitate to consult a vet for further guidance.
Step 10: Understand the Risks of Infection
An infected claw can lead to more serious health issues, so keeping an eye out for signs of infection is critical. Look for redness, swelling, or discharge from the injured area. These are common symptoms of infection, and you should address them quickly. If you see any of these signs, contact a vet immediately.
Infections can spread quickly in reptiles, making early intervention crucial. If left untreated, an infected claw can result in long-term damage. Ensuring that the area stays clean and applying topical treatments will help minimize the risk of infection.
FAQ
What should I do if my red-eared slider’s claw is bleeding?
If your red-eared slider’s claw is bleeding, your first priority is to stop the bleeding. Gently clean the area with warm water to remove any debris. Apply a small amount of styptic powder or cornstarch directly to the bleeding area to help it clot. If the bleeding doesn’t stop within a few minutes, you should contact a vet for professional assistance. Keeping the turtle calm during this process is important to avoid further stress.
How can I tell if the broken claw is infected?
Signs of infection in a broken claw include increased redness, swelling, warmth around the injury, and any discharge such as pus. If you notice any of these symptoms, it’s important to seek veterinary care. Infections can spread quickly in reptiles, so acting fast can prevent more serious complications.
Is it safe to apply a bandage to the broken claw?
While applying a bandage can help protect the injury, it should be done carefully. The bandage should not be too tight, as it can cut off circulation. It should only be used if absolutely necessary and should be monitored frequently to ensure it’s not causing more harm. Generally, it’s best to keep the area open to air unless there’s a risk of the injury getting dirty.
Can a broken claw heal on its own without treatment?
In some cases, a minor break may heal on its own without much intervention. However, it’s always better to err on the side of caution. Cleaning the wound and keeping an eye on it for signs of infection will help ensure it heals properly. If the injury appears severe, or if you’re unsure, seeking veterinary care is the best option.
How long does it take for a red-eared slider’s claw to heal?
Healing time can vary depending on the severity of the injury. A simple crack might take a couple of weeks to heal, while a more severe break or injury may take longer. Regular monitoring and proper care will help speed up the process. If the claw doesn’t show signs of healing after a few weeks, consider consulting a vet.
Can I give my red-eared slider medicine for the pain?
It’s generally not recommended to give your red-eared slider any over-the-counter pain medication. Reptiles have different metabolisms, and many common medications can be toxic to them. If you believe your turtle is in pain, it’s best to consult a vet. A professional will know how to manage pain safely.
What should I feed my red-eared slider during recovery?
Providing a balanced diet is crucial for the healing process. Offer a variety of foods, including high-quality pellets, leafy greens, and occasional protein sources like insects or fish. A healthy diet ensures your turtle has the necessary nutrients for tissue repair. Calcium and vitamin D are also important for bone health, so make sure to include these in its meals.
Can my red-eared slider continue swimming with a broken claw?
It’s generally okay for your red-eared slider to swim with a broken claw, as long as the injury is properly cleaned and treated. However, try to limit its activity to prevent further strain on the injury. If the claw is severely damaged or you’re unsure, it’s best to limit its swimming until you get a professional opinion.
How can I prevent future claw injuries?
To prevent future claw injuries, make sure your red-eared slider’s habitat is free from sharp or rough objects. Smooth surfaces and edges are important to reduce the risk of scratches and breaks. Additionally, ensure your turtle’s claws are in good health by providing a well-rounded diet and proper supplements, particularly calcium.
Should I separate my red-eared slider from other turtles during recovery?
It’s a good idea to separate your injured turtle from other turtles while it heals. This reduces the chance of the injury being further aggravated during interactions. It also allows the turtle a quiet, stress-free environment, which can speed up the healing process. Keep the injured turtle in a peaceful, low-traffic area of the tank until it fully recovers.
Final Thoughts
Treating a red-eared slider’s broken claw requires care and attention to detail, but it doesn’t have to be overwhelming. By acting quickly and following the right steps, you can help your turtle recover comfortably. The most important part is cleaning the injury and monitoring it closely for any signs of infection. With the proper care, many minor claw injuries can heal on their own, but don’t hesitate to reach out to a vet if you’re unsure or if the injury worsens.
It’s essential to remember that your red-eared slider’s health is not just about treating the injury itself. Maintaining a clean and calm environment, offering a balanced diet, and ensuring proper hydration can help support the healing process. A stress-free space will also help your turtle recover without additional complications. Regularly checking the injury and being patient will help you stay on top of the healing process and ensure that it progresses smoothly.
Preventing future injuries is just as important as treating the current one. By adjusting your turtle’s environment to remove sharp objects or rough surfaces, you can reduce the risk of further claw damage. Additionally, offering a nutritious diet that promotes bone and claw health will help keep your turtle strong and less susceptible to injuries. Simple changes in your care routine can make a big difference in the long-term health and well-being of your red-eared slider.

Hello,
If you enjoy the content that we create, please consider saying a "Thank You!" by leaving a tip.
Every little bit helps us continue crafting quality advice that supports the health, happiness, and well-being of pets around the world, for pets of all shapes, sizes, and species.
We really appreciate the kindness and support that you show us!